All posts by admin

How to InstallTurboTax.com in Mac – GoTaxation

TurboTax is the American tax filing software that helps the user to pay the taxes on time without any further delays. Also, it makes the process of tax calculations much easier than earlier.
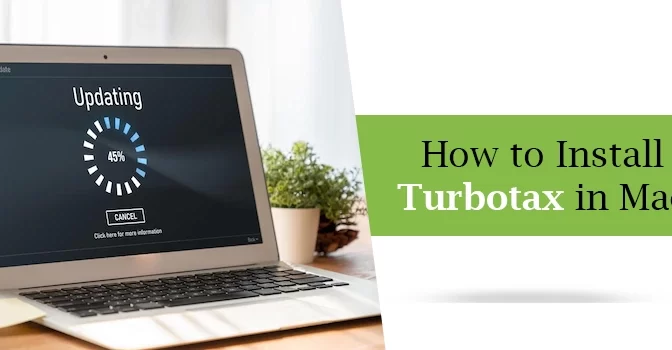
Therefore, to get the TurboTax software on your Mac device, you must download and install it. In this blog, we have elaborated all the steps you must perform to TurboTax download mac device. Also, we have listed the basic system requirements to install the software smoothly on your device.

Need technical assistance to install TurboTax on a Mac device? Call us at @ +1-844-508-2335 and have a conversation with our professionals to get instant help. 

System Specifications to Install TurboTax on Mac

Before proceeding further with installing TurboTax software on your Mac device, it is necessary to fulfill the basic system requirements to run the application. Read the below-listed pointers carefully for a proper understanding of the system requirements for the TurboTax installation.

1. Operating System:-

  • The TurboTax 2023 version is compatible with the macOS Big Sur 11 or the version higher than this.
  • For the 2022 edition of the TurboTax software works best with the macOS Catalina 10.15 or the upper versions.
  • On the other hand, the 2021 edition works well with the macOS High Sierra 10.13 or the higher versions.
  • It is also compatible with the 2020 edition of macOS High Sierra 10.13 or the higher versions of the operating systems.

2. Processor:-

Make sure that you must have a multi-core intel processor with 64-bit of the storage space.

3. Hard-Drive Space:-

Check that your system must have at least 1 GB of hard disk space to install the TurboTax on a Mac device.

4. CD/DVD:-

The users might require the installation CD/DVD drive to install the TurboTax software via CD.

5. Internet Connection:-

You must ensure that you have 1 MBPS of modem and a good internet connection. An internet connection is required for product activation, software updates, and online features.

6. Screen Resolution:-

One must ensure that the screen resolution must be 1024 X 768 or higher than this.

7. Mac-Compatible Printer:-

You must have a Mac-compatible printer for printing the tax return or any other tax forms.

Stepwise Instructions To Install TurboTax on Mac With CD Drive

  1. Here, we have described some simple instructions to install TurboTax on a Mac device.
  2. Initially, put the TurboTax CD or DVD drive within the assigned slot of your device.
  3. Now, you have to wait until the device reads the contents present within the CD.
  4. After this, from the list of all the files, search for the .dmg file. The .dmg file is the main file that is required at the time of installation.
  5. Soon after this, put the tick mark beside the TurboTax and then drag it to the application folder.
  6. Later on, move to the Application folder and launch the TurboTax file on your Mac device.

Procedure to Install TurboTax on Mac Without Using CD Drive

If you wish to install the TurboTax software on the Mac device without accessing the CD drive? Don’t panic. Instead, go through the stepwise instructions given below.

  1. If you wish to install the TurboTax software smoothly on your device, shut down the security software installed on your Mac device.
  2. Launch Safari or any other web browser and access the TurboTax official website.
  3. Now, you are supposed to pick the TurboTax version you desire to download on your device.
  4. After picking the appropriate version of TurboTax, tap on the highlighted Download button.
  5. Once the file has been downloaded successfully, open it and launch the TurboTax setup file to install on the Mac device.
  6. Later on, go through the instructions on the screen to proceed further.

Simple Steps to Install TurboTax on MacBook Pro

Go through the proper stepwise instructions written below to install TurboTax on MacBook Pro.

  1. In the initial stage, put the installation CD into the optical drive of the MacBook Pro.
  2. You are supposed to wait for some time so that you can successfully install the CD.
  3. Thereon, to run the entire setup process, launch the program files of the TurboTax CD.
  4. Later on, act as per the instructions displayed on the screen to begin the installation of the TurboTax on the MacBook Pro software.
  5. Afterwards, tap on the Finish option on your screen to end up with the installation process.
  6. Relaunch your MacBook Pro, and it will end the installation of the TurboTax software.
Wrapping It Up!!

Hopefully, we assure you that the steps described above in this post will guide you to install TurboTax on Mac device. However, if you are still struggling while installing the application, talk to our professionals through the live chat facility for quick assistance.

How to Remove TurboTax Deluxe from your Windows or Mac?

Most of the time, users need to remove TurboTax Deluxe if they don’t wish to use the software anymore. But, they find the process of uninstalling the Program a little tricky. So, to make it easier for them, we have elaborated the proper setup of instructions to remove the TurboTax Deluxe. Go through this entire post, and you will gather all the essential details required.

Note: The user can easily uninstall the software using the Control panel, but at times, the supporting files of the app will remain in the System. These files can damage your System and reduce its performance. Thus, you must have to remove these files as well.

Want to Remove the TurboTax Deluxe immediately from your Device? Call on @1844-508-2335 and get instant help from a TurboTax expert.

How to Remove TurboTax Deluxe for Windows?

No matter whatever reason is behind the uninstallation of the TurboTax software. You can go through this blog section to learn the procedure of removing TurboTax Deluxe from your Windows device.

Step 1: Remove TurboTax Deluxe with the help of the Control Panel

The process to uninstall the TurboTax Deluxe software differs according to the Windows version you are using.

Steps for Windows 8

  • Begin the process by pressing the Start icon.
  • Now navigate to the Control Panel and select the Programs and Features tab.
  • Thereafter, check the list of options, then right-click on TurboTax and uninstall it.
  • Wait for some time so that the uninstallation of the Program will be complete.
  • Lastly, reboot your Device.

Steps for Windows 10

  • Start the process by hitting the System.
  • Moving ahead, select the Apps and Features tab.
  • Now, select TurboTax, and hit the Uninstall button.
  • Reboot your System.

After restarting the System, check if the TurboTax Program has been removed from your Device. In addition to that, you have to check the installation folder as well. You can find it in the C drive program File.

Here in the Program File, look for a file named uninstall.exe. In case you find it, double-click on it to start the default Uninstaller and delete the TurboTax Software from your Windows Device.

Step 2: Delete all the Leftover files and folders related to the Program

The above steps will help you uninstall the TurboTax software from the Control panel, but this doesn’t end your job. Now, you have to remove all the temporary files, cache folders, setup files, and registry entries that are related to TurboTax software.

i) Remove the Registry entries

The first thing you need to do is delete the Windows Registry entry. You can do so by following the given instructions:

  • Begin the process by right-clicking on the Start icon.
  • Thereafter click on the Run tab.
  • Write down “Regedit” in the required field and hit Enter to start the Registry Editor.
  • Choose the Edit menu and look for the Find Button at the Bottom.
  • Write down the keyword of the TurboTax in the required Box, then select the Find Next tab.
  • Remove all unwanted and incorrect data.

Note: Be careful while deleting the Windows Registry, as it is a database that has collected all the important configuration files.

ii) Remove all the Hidden Files and Folders

Now, lastly, you have to delete all the Hidden Files and Folders that are linked with TurboTax Software.

  • Start the process by right-clicking on the Start Button.
  • Choose Control Panel, and go to Appearance and Personalization.
  • Tap on the Folder tab, and click on the View button.
  • Select the Show Hidden Files folder and drives section.
  • Move ahead by right-clicking on all the files in this folder.
  • Thereafter, tap on Uninstall button and immediately navigate to the C drive.
  • In the C Drive, follow the path as Program Files\  Document\Settings\All Users\Application Data\ Documents\Settings\%USER%\Application Data\.
  • Now, find all the files that are linked with TurboTax and delete it one by one.
  • Once you have deleted all the items, go to the Trash Folder.
    Note: Make sure the Trash folder has nothing left related to TurboTax.
  • Lastly, restart your System to refresh it completely.

How to Remove TurboTax Deluxe from Mac Devices?

In the case of Mac devices, the uninstallation process is a little easier if compared to Windows. However, new Mac users may not agree with this. Thus if you are a newbie, check the steps discussed below to remove TurboTax Deluxe from your Mac device.

Step 1: Delete TurboTax Deluxe Software from Mac

  • Initiate the process by selecting the Finder option.
  • Thereon, look for Applications and choose TurboTax Deluxe and swipe its icon to the Trash icon.

Note: You can also do the same by right-clicking on the TurboTax program, then clicking on the Move to Trash option.

  • Now, you have to enter the Administrative Security pin.
  • Lastly, choose the Finder and Clear Trash using the Menu bar.

Note: The Program can also be removed using the Launchpad interface.

Step 2: Remove supporting files of TurboTax from the Mac device

Now, to delete all the TurboTax supporting files to protect your Mac from any harm, you can check the information given below:

  • Tap on Finder and click on the Go tab.
  • Enter /Library in the Go folder box.
  • Thereafter Hit the Enter button.
  • When the /Library folder appears on your screen, look for the Search box and enter the keywords related to TurboTax in it.
  • Now, click on Library present next to the Search option.
  • Here, a list of all the files and directories will appear on your screen; review and pick those that match your keyword.
  • Now, choose the Move to Trash button.
  • You have to do the same process repeatedly to remove all the TurboTax leftovers on the ~/Library files or directory.
  • Once you delete all the supporting files of TurboTax Deluxe from your Mac, empty the Trash folder as well, and restart your Device.

Conclusive Note!

At this point of the Article, we hope that you will now remove the TurboTax Deluxe program easily from your Device. However, if you find difficulties while following any step, reach out to GoTaxation professional using the Live Chat option (Help Box) given at the Bottom of the page. You can even mail us your Query and get a step-by-step solution.

QuickBooks Error Code 195 : Quick Tips to Fix

QuickBooks Error 195 is a common technical error that occurs due to misconfigured Operating System Files and various other causes. Based on the different causes, you need to take separate measures. For that, we are here going to discuss all the possible causes due to which QuickBooks errors occur and how we can resolve them. Read the article further to know more about QuickBooks Error Code 195.

Constantly Receiving Error Code 195 while using QuickBooks? Call us at @+1844-508-2335 and get an instant solution for any problem you are getting while using QuickBooks. 

What are the primary causes of Trigger QuickBooks Error Code 195?

Various reasons why you are receiving QuickBooks Error Code 195 are listed below:

  • Improper installation or downloading of the QuickBooks application leads to the formation of corrupted files and also affects the functionality of the program.
  • Window Registry files are corrupted.
  • QuickBooks application might be damaged by any virus file or malware.
  • You have improperly shut down the QuickBooks application without saving any data, which might create corrupted files in the system, thus instigating QuickBooks Error Code 195.

How to Fix QuickBooks Error Code 195?

Based on the given cause above, various measures can be taken in order to fix Error code 195. Some of them are listed below:

Use Window Repair Utility Tool

One of the primary methods to repair QuickBooks Error Code 195 is to run a Troubleshooter/Repair Utility Tool on your device. Following are the steps for using Repair Utility Tools:

  • Open Settings and then select “Update & Security” from the left-hand side of the page.
  • Choose “Troubleshoot” and then “Run the Troubleshooter.”
  • Once the process is completed, run QuickBooks again to check if you are still receiving QuickBooks Error Code 195.

Reinstall the QuickBooks application in your system.

You need to uninstall the QuickBooks program from your system and, after that, download and install it again. Make sure that you have a stable internet connection while you download the program.
Uninstall QuickBooks

  • Open the control panel and then navigate to the section “Program and Features.”
  • Under that, select the option “Uninstall a program,” after which a list of programs will appear on the screen.
  • Select QuickBooks, right-click on it, and then choose Uninstall.

Reinstall QuickBooks

Once you have downloaded the QuickBooks Installation, locate the file in your download folder and follow the given steps:

  • Double-click on the file, which will start the installation process.
  • Agree to all the terms and conditions and allow the QuickBooks application to make changes to your system.
  • Wait for the installation to complete, and after that, launch the QuickBooks application again.

Run an Antivirus Scan on your system.

Before you uninstall the QuickBooks from your system, run an Antivirus scan in order to check for any malware files or Viruses in your system. In case the Antivirus detects any corrupt or suspicious file, then you need to remove it and then open QuickBooks again to check for Error Code 195

Update your QuickBooks application to the latest version to Fix Error Code 195

If you are using the QuickBooks Desktop application, then you need to check for any pending updates and downloads. Follow the given steps in order to update the QuickBooks application:

  • Open QuickBooks and then navigate to the Help option from the top of the screen.
  • Click on the help option and then select Update QuickBooks Desktop.
  • Select Update Now and then Get Updates in order to start downloading the updates.
  • Close the QuickBooks and Reopen it again.

Verify and Rebuild QuickBooks Company Data Files

Any damaged data file can also trigger QuickBooks Error Code 195. Thus, you need to check out for them and if necessary, Rebuild Data Files in QuickBooks. Follow the given steps in order to Verify and Rebuild Company Data Files:

Verify Company Data Files

  • Open QuickBooks and go to the Window option. There, select Close All.
  • Now, go to the File option and select Utilities.
  • Click on Verify Data in case you see any error message or “Your Data has Lost Integrity.”

Rebuild Your Company Data

In order to Rebuild company data files in  QuickBooks follow the given steps:

  • On QuickBooks select Files, and choose the option “Utilities”,
  • From the Utilities, select “Rebuild Data”.
  • Before you proceed to Rebuild, QuickBooks will ask you to create a Backup of your files, for which you need to click on OK. Make sure that you have created a backup in a new folder.
  • Enter a new file name and select Save. Once a backup folder has been created, QuickBooks will start rebuilding data.
  • Once the process has been completed, you will receive a message, “Rebuild has been completed.”
  • Now to need to verify the rebuild data again for any error or additional damage.
Restore your System to the Previous Version

Any recent update or changes in the system might have triggered QuickBooks Error Code 195. To fix that, you need to restore your system to the previous version step, which is listed below:

  • Open the system properties. For that, you can either type “Restore” in the start menu or right-click on the “My Computer” folder and then select Properties.
  • There, you can find the option “System Restore,” right-click on it and then select “Run as Administrator.”
  • Now the system restores window will pop up with the list of recent updates. You need to select the most recent point.
  • Click on Next and follow further instructions. Once restored, you need to restart your system.
Connect with QuickBooks Technical Support

In case you are still unable to resolve QuickBooks Error Code 195, then you need to connect with the QuickBooks help services for which we have given the below steps to reach them:

  • Open QuickBooks and then navigate to the option Help and then choose QuickBooks Desktop Help. You can directly press F1.
  • Now click on “Contact Us” and submit your query related to Error Code 195. After that, click on “Search.”
  • Now, two options will be available: Call Us or Message Us.
Winding Up

In this blog, we have mentioned all the effective measures to fix QuickBooks Error Code 195. But, if you are still receiving the same error code again and again, then click on the “Help” option below to use the live chat facility and get an instant solution to any QuickBooks error.

Simplified Methods to Resolve QuickBooks Error PS032

Payroll is one of the most important features of QuickBooks that enables users to pay their employees on time. To enhance the better experience of QuickBooks Payroll, it is advised to update it timely. But, at times, the users might strike with QuickBooks Error PS032 while downloading the latest QuickBooks Desktop or payroll. The following error message comes into view on the occurrence of the error:

“[PS032] QuickBooks can’t read your payroll setup files. Note the message number at the beginning of this message, click Help for troubleshooting tips to resolve this problem.” 

However, it is essential to figure out the QuickBooks Error Code PS032 to continue your payroll-related tasks without further delays. Read the entire blog attentively to get in-depth information on how to overcome the error.

Unable to process the payroll due to QuickBooks Error PS032? If yes, don’t panic and dial @1844-508-2335 to connect with our professionals for instant resolution. 

Reasons Why You End Up With QuickBooks Error Code PS032

We understand that it gets quite annoying for the users when they come across QuickBooks Error PS032 while accessing the payroll. Therefore, to fix the issue, it is essential to know the root causes of the error, which are as follows;

  1. Inappropriate billing information is one of the reasons that might lead to Error PS032 in QuickBooks.
  2. Another reason may be damage or corruption in the QuickBooks company file.
  3. There might be the possibility that you haven’t registered your QuickBooks Desktop software.
  4. A firewall or third-party security application interrupts QuickBooks from getting the latest updates.

Key Points You Must Know Before Fixing QuickBooks Error PS032

Here, we have mentioned some essential key points using which you can easily resolve QuickBooks Error PS032.

  1. Check that you are utilizing the active QuickBooks Payroll subscription.
  2. Always keep a copy of the QuickBooks company file so that you can use the backup file if the original file gets damaged.
  3. To receive the latest security updates, you must update the QuickBooks Desktop to the currently available version.
  4. Verify that you have installed only one version of the QuickBooks software on your device.

Verified Solutions to Rectify QuickBooks Payroll Error PS032

Here, we have described some tried and tested solutions using which you can easily handle QuickBooks Error PS032. Ensure you apply the steps in the same order as written below.

Troubleshooting Method 1: Examine Your Billing Details

As stated above, the users might end up with QuickBooks Error PS032 while adding the wrong billing information. Therefore, it is best to check the billing information by applying the steps below to avoid this issue.

  1. In the initial stage, press the F2 key to bring up the Product Information window on your screen.
  2. From the following screen, note down the QuickBooks License number displayed on the screen and check it twice for further discrepancies.
  3. After this, tap the OK button and shut down the Product Information window.

Troubleshooting Method 2: Utilize the Verify and Rebuild Data Tool

Sometimes the users might get QuickBooks Payroll Error PS032 due to the damaged company file. So, to repair the damaged data file, make use of the Verify and Rebuild data tool by following the instructions below.

  1. Begin the process by clicking on the File tab followed by Utilities option.
  2. Soon after this, choose Verify Data and wait for the application to wind up the process.
  3. Suppose if you receive the message stating, ‘Your data has lost integrity you need to rebuild your data”. In such a scenario, return to the File menu and opt for Utilities.
  4. Proceed further by choosing the Rebuild Data option and clicking OK when prompted to open the data file.
  5. Next, tap OK when you get the message on your screen stating: “Rebuild has completed.”
  6. End the process by running the Verify Data Utility by using the above two steps.

Troubleshooting Method 3: Turn Off the User Account Control

  1. Primarily, open the Run command window by typing Run into the search column of the Windows Start menu.
  2. In the upcoming screen, write “Control Panel” within the search field and click the OK button to move further.
  3. Consequently, it will take you to the new screen where you must type User Accounts into the Search column of the Control Panel.
  4. Navigate to the Change User Account Control Settings and click the Yes button.
  5. Later, you must move your slider towards the “Never Notify” option to switch off the User Account Control Settings.
  6. At last, restart your computer and try downloading the updated QuickBooks Payroll version.

Troubleshooting Method 4: Assign a Different Name to CPS Folder

  1. To begin with, launch File Explorer using the shortcut keys i.e, Windows + E, from your keyboard.
  2. After that, tap on the drop-down menu to choose “This PC” option.
  3. Move to the local C: drive and proceed to the next step.
  4. You can also search for the program files by accessing the Program Files folder if you cannot locate them.
  5. Look for the QuickBooks Desktop folder where you saved the file you are presently using.
  6. Thereafter, access the components and move to the payroll folder.
  7. You must pick the renamed folder by right-clicking on the CPS folder.
  8. Next, try to change the name of the CPS folder by adding CPSOLD and hitting the Enter key from your keyboard.
  9. Now, launch the QuickBooks Desktop application and generate a new CPS folder.
  10. Finally, begin using the payroll tax table update just after downloading it and check whether the issue is resolved or not.
Ending Words!!

This is all about QuickBooks Error PS032, and we hope the solutions listed above will help you deal with this error. However, if you are still stuck with the same error and need expert’s help, then consult with GoTaxation professionals through the live chat facility.

QuickBooks Desktop Payroll Error PS107: Troubleshoot Easily and Fast

Many times, users might come across QuickBooks Desktop Payroll Error PS107 due to the damaged file in the QuickBooks application. Sometimes, it might also be caused while utilizing an obsolete version of the payroll tax table. On the occurrence of this error, the following error message pops up on the screen stating:

“An internal file in QuickBooks has become unreadable [PS107]”. 

As a consequence of this error, it affects the process of downloading the latest QuickBooks payroll. Thus, it is crucial to overcome this error asap with the correct measures explained further in this blog.

Didn’t have any clue on how to resolve QuickBooks Desktop Payroll Error PS107? Call us at @+1844-508-2335 and get all answers to your queries within the least time applicable. 

What are the reasons that instigate QuickBooks Payroll Error PS107?

Here, we have described some of the root causes that are responsible for the occurrence of Error PS107 in QuickBooks.

  1. You haven’t installed the QuickBooks Desktop properly on your device.
  2. Sometimes, it might evoke if you haven’t updated the QuickBooks Payroll subscription.
  3. Accessing the obsolete version of QuickBooks is one reason for this error.
  4. Moreover, it might trigger when your system is attached to a low or unstable interrupted internet connection.

Simplified Solutions to Rectify QuickBooks Desktop Error PS107

In this blog’s section, we have described some instant ways to overcome QuickBooks Error Code PS107.

First Solution: Download the Latest Version of QuickBooks Desktop

Using the obsolete version of QuickBooks might interrupt the users from getting the latest QuickBooks payroll updates. So, to fix the issue, check that you are operating the most upgraded version of the QuickBooks.

  1. Exit from your company file and launch the QuickBooks application on your device.
  2. After this, press the Windows key, look for the QuickBooks Desktop icon, and right-click on it.
  3. Now, choose the highlighted Run as Administrator option.
  4. From the No Company Open window, select the Help menu followed by Update QuickBooks Desktop.
  5. Afterwards, hit the Options tab, opt for Mark All, and click the Save button.
  6. Moving further, head towards the Update Now tab and mark the Reset Update checkbox.
  7. Next, choose the highlighted Get Updates option and close the QuickBooks application once the update is finished.
  8. Click on the Yes option to install the latest updates of the QuickBooks Desktop.

Second Solution: Get the Latest Version of the Tax Table Download

At times, users might encounter QuickBooks Error PS07 while using an older tax table version. So, upgrading your tax table whenever you must pay your employees is recommended to avoid further discrepancies. Below we have listed some of the simple steps to update your tax tables.

  1. Initially, choose the highlighted Employees tab and tap on the Get Payroll Updates.
  2. Afterwards, you must mark the checkbox “Download Entire Update.”
  3. At last, hit the highlighted Download Latest Update option.

Third Solution:- Clean Install QuickBooks in Selective Startup Mode

Sometimes, the background running processes might lead to QuickBooks Desktop Payroll Error PS107. Clean installing the QuickBooks by selective startup mode will ensure that no background processes will intervene with the QuickBooks application.

Follow the steps described below to accomplish the process. 

  1. Firstly, launch the Run command window by pressing the Windows + R keys together.
  2. In the Run window, insert “MSConfig” within the required text field and opt for the OK button.
  3. From the System Configuration window, navigate to the Selective Startup and Load System Services in the General tab.
  4. Now, mark the checkbox beside “Hide All Microsoft Services” from the Services tab.
  5. Furthermore, opt for the Disable All button and see that the “Hide All Microsoft Services” checkbox is unmarked.
  6. Moreover, you must verify that the Windows Installer checkbox is marked and hit the OK button.
  7. Afterwards, tap on the Restart option from the System Configuration window.
  8. After that, clean install QuickBooks Desktop, and launch the Run window once again.
  9. Insert “MSConfig” within the search column and hit OK > Normal Startup > OK.
  10. Finally, you must tap on the Restart option from the System Configuration window.

Fourth Solution: Close QuickBooks and then Relaunch it.

There are multiple things that are set as default when you relaunch your application and this is the best way to resolve QuickBooks Error Code PS107. Go through the instructions below to shut down your application and start it again.

  1. In the initial stage, hit the Alt + Ctrl + Del keys altogether and hit the Start Task Manager option.
  2. Afterwards, move to the Processes tab within the Task Manager window.
  3. Now, you must highlight all of the applications that start with QuickBooks.
  4. Finally, choose the End Task/End Process option to complete the entire process.
Fifth Solution: Examine your Payroll Service Subscription

An inactive QuickBooks Payroll subscription is also one of the reasons that might trigger QuickBooks Error Code PS107. So, checking that you are using the updated payroll subscription is necessary. Go through the stepwise instructions given below to check your payroll service subscription.

  1. Before proceeding further, exit from all your company files and relaunch your system.
  2. After this, launch QuickBooks, select the Employees tab > My Payroll Service > Manage Service key.
  3. Ensure that the Service Name and Status mentioned is correct and will display the status as Active.
  4. Furthermore, tap on the Edit option and check the service key number. If you find the service key number inappropriate, add the correct one.
  5. You are supposed to tap on the Next button and unmark the Open Payroll Setup box, followed by the Finish option.

Final Thoughts!!

So, here we end this entire post and hope you might find it beneficial in resolving QuickBooks Desktop Payroll Error PS107. However, if you still need help fixing the error, consult our experts through the live chat facility for instant help.

Troubleshoot QuickBooks Multi-User Mode Issues with Expert Help

QuickBooks multi-user mode not working is a problematic condition in the program that can hamper your crucial accounting tasks. Multi-user mode in QuickBooks allows multiple users to access the same company file at the same time. The company owner can grant users with different levels of access permissions to view, access, and modify the company file.

However, when accessing the company file, you may encounter an error message on your screen, which hinders an ongoing task. Reading this post until the end can help you troubleshoot the multi-user mode error in QuickBooks. 

Having trouble accessing the QuickBooks company file in multi-user mode? Get in touch with us to get relevant assistance. 

What Is Multi-User Mode in QuickBooks Application? 

Working in QuickBooks multi-user environment gives users the flexibility to access the company file remotely on their system and work on it. In multi-user mode, a company file is hosted on a server computer, and several other systems at the terminal are connected to it. These systems are known as WORKSTATIONS that accesses the company file from the SERVER computer.

This gives users the flexibility to work and allows seamless collaboration. Besides, they work with the latest modified data, thereby alleviating the scope for the accounting error. 

Possible Reasons Behind The QuickBooks Desktop Multi-User Mode Error

Some of the most apparent reasons behind “the unable to run QuickBooks in multi-user mode are stated in the below-given list:

  • The server computer doesn’t have the QuickBooks Desktop software installed on it. 
  • Your Firewall or Antivirus application interfering with the QuickBooks connection can also give rise to this error. 
  • When QuickBooks Database Server Manager fails to access the company file, the error can come into your sight. 
  • Incorrect or damaged DNS settings. 
  • Improperly configured Windows File permissions can make users unable to run QuickBooks in a multi-user environment. 
  • Erroneous configuration of the QuickBooks company file hosting is also a possible reason that brings forth multi-user mode error in the program. 

Symptoms of Multi-User Mode Issues in QuickBooks 

You can determine the QuickBooks multi-user mode not working issue with the below-listed symptoms: 

  • Trouble in switching to multi-user mode. 
  • You may not be able to access the data file located on another computer. 
  • You may see various error codes related to the multi-user mode, such as H101, H202, H303, H505, and several others. 
  • Users might see an error message on their screen when switching to the multi-user mode. 
  • QuickBooks stops working or freezes when performing a task. 
  • Your Windows PC becomes sluggish in operation. 

Things To Keep In Mind Before You Fix The Error Hosting Multi-User Mode 

Before you proceed further with the error resolution, you need to consider some essential pre-conditions as stated below: 

  • Make sure that QuickBooks Database Server Manager is installed and enabled. 
  • Installing the same version of the server manager as QuickBooks can keep this technical issue at bay. 
  • When configuring the hosting settings, make sure that the hosting is enabled on the server computer, while it must be disabled on workstations. 

Effective Solutions To Troubleshoot Multi-User Mode Problem in QuickBooks

Now that you are aware of the possible causes and able to determine the error with its symptoms, below are some effective troubleshooting solutions to eliminate the error: 

First Method: Utilize QuickBooks File Doctor To Fix Multi-User Mode Error

You can access QuickBooks File Doctor from QuickBooks Tool Hub. If you want to run this tool, you need to download the tool hub on your system in the first place. Below are the steps: 

  • Go to Intuit’s official website, wherein you need to locate and download the latest version of the QuickBooks Tool Hub. 
  • Once downloaded, save the file to a suitable location. 
  • Thereafter, go to the download location and open the QuickBooksToolHub.exe file to install it. 
  • Follow the on-screen instructions, and once the tool is installed, agree to the terms and conditions to put the tool to use. 
  • After finishing, click the QuickBooks Tool Hub icon on your desktop to open it. 
  • When it opens, you can see the categories of program problems listed in it. 
  • Here, choose Company File Issues, and it will allow you to run QuickBooks File Doctor. 
  • Wait for the tool hub to scan and repair the damaged QuickBooks company file. 

Once done, check if the QuickBooks multi-user mode not working issue is fixed or not. If the error continues, move to the next solution.

Solution 2: Utilize QuickBooks Database Server Manager

QuickBooks Database Server Manager is another effective tool from the Tool Hub that can be used in resolving the multi-user mode error. Now that you have downloaded the tool hub in the first solution open it and follow the below-given steps: 

  • When in the tool hub, select Network Issues. 
  • After that, choose QuickBooks Database Server Manager to resolve the issue. 
  • Type database in the Start menu to go to the Database Server Manager on the server.
  • If you are unable to locate the folder containing the QuickBooks Company File, use the Browse option. 
  • In the end, click OK and hit the Start Scan button. The Server Manager will now look for potential network issues and resolve them. 
Final Words!

This post explains some effective solutions to eliminate the QuickBooks Multi-user mode not working error. Hope you find it helpful in the error resolution. However, if you are still experiencing this error and need additional help, connect with our expert professionals and get the desired help in this erroneous condition.

Solve QuickBooks Error 6150 Quickly and Easily

QuickBooks Error 6150 is the company file error that usually occurs when the years fail to access the data file. In other instances, it might evoke due to damaged or corrupted company files. Whenever the error comes, it starts throwing the following error message on the screen stating:

“We’re sorry. QuickBooks couldn’t open your company file.
We’ll try to fix the problem. Click Start to begin. 
If the problem continues, contact support for assistance and report error code: (-6150,-1006).” 

Consequently, this error prevents users from opening the QuickBooks company file. Thus, it leads to a delay in the ongoing business task. So, to fix the issue, you must read this entire post attentively to overcome the Error 6150, -1006 in QuickBooks.

Are you facing difficulty while resolving QuickBooks Error 6150 and need an expert’s help? Worry Not!! Instead, talk to our professionals by dialing @+1844-508-2335 and eliminate the error within no time. 

Reasons Why You End Up With QuickBooks Error Code 6150

Go through the below-listed points to learn about all the factors responsible for QuickBooks Error 6150.

  1. Sometimes, it may occur due to a fault in the installation of QuickBooks Desktop.
  2. Another reason could be damage to your company file extension.
  3. It might evoke when the QuickBooks-related files have been removed accidentally.
  4. You are trying to launch the portable file (.qbm) without opening the QuickBooks software.

Scenarios When Users Experience Error 6150, 1006 in QuickBooks

Most of the time, users won’t determine whether they confront the error or not.  In certain scenarios, you must look at the below-listed signs and symptoms to identify QuickBooks Error 6150.

  1. You might discover that you get Error Code 6150 along with the description.
  2. Also, it might occur when your system begins to freeze for a few seconds.
  3. Your PC starts performing sluggishly and responds slowly to the user’s commands.
  4. The users won’t be able to access the QuickBooks data file.

Simple Tricks to Eliminate QuickBooks Error 6150 and 1006

After getting in-depth information regarding the root causes behind the error 6150, 1006 in QuickBooks, let’s proceed to the troubleshooting part. Below, we have enumerated some tried and tested solutions to wipe out the error instantly.

First Troubleshooting Method: Examine the Presence of CryptoWall Virus

The Cryptowall virus might enter your device via trojan horse and encrypt your company file. As a result, it might lead to QuickBooks Error 6150. Go through the steps below to verify the presence of crypto wall.

  1. Initially, move to the Start menu, and write “File Explorer” within the search area.
  2. As a result, it will launch File Explorer on your screen.
  3. Within the following window, locate and launch your QuickBooks folder. You will mainly find your folder on the C: drive.
  4. Now, search for the files that include the words, i.e., “decrypt” or “instructions” (.txt or .html).

If you fail to find out any file that tallies the description, carry on with the methods below.

For instance, if you get any file that matches your description, look for the antivirus service providers. Later on, ask them for an instant solution for Cryptowall.

Second Troubleshooting Method: Restore the Backup Company File

The users need to generate the backup of their QuickBooks data file. You must try to reload the last backup that you have generated if you won’t be able to access your data file due to QuickBooks Error 6150. Once the backup is generated, you have to redo the work that you have done, but you won’t get the error again. To accomplish the process, apply the steps given below.

  1. Firstly, tap on the QuickBooks File menu and navigate to the Open or Restore Company.
  2. Afterwards, head towards the Restore a Backup Copy and then hit the Next option.
  3. Now, choose the highlighted Local Backup option and click the Next button.
  4. You are supposed to search for your backup company file. The backup company file mainly seems like: [Your company name].qbb.
  5. Next, pick the folder you want to restore the QuickBooks company file and tap on the Open option.
  6. Once everything is done, choose the Save button. If you get any message about possibly overwriting your data, choose the suitable option for your requirements.

Third Troubleshooting Method: Utilize the Auto Data Recovery to Restore the Lost Data

QuickBooks utilizes the Transaction Log file (.TLG) to restore lost or damaged data. Therefore, to restore the file, you must use the original .TLG file with .QBW.adr file.

  1. Initially, make a new folder and name it, say QBTest folder.
  2. Go to the folder where your QuickBooks company file is stored and then navigate .TLG file in your company’s file folder. You will see that your data file contains the same name as your data file. If you won’t be able to get the .TLG file, implement the steps below.
    • Begin the process by launching File Explorer by hitting the Windows + E keys together on your keyboard.
    • After this, move to Organize, followed by Folder and Search Options.
    • Then, choose the highlighted Hide Extensions for known file types.
    • At last, click on the Apply option followed by OK.
  3.  After this, you have to copy the .TLG file of your data files and paste it into the QBTest folder.
  4. Access the folder named QuickBooksAutoDataRecovery. You will find this folder within the same location as your data file.
  5. Copy the .QBW.adr file and paste it into the QBTest folder. With this, you will see that you have both these files within your QBTEst Folder i.e, “.tlg” and “.QBW.adr”.
  6. Navigate to the QBTest folder, right-click on the file named .QBW.adr, and choose Rename.
  7. You have to erase .adr from the end of your file name and launch the data file stored on the QBTest folder.
  8. Furthermore, choose the File option > Utilities > Verify Data to examine the integrity of the recovered file.

Ending Note!!

So, here we wrap up this post and hope that the solutions discussed above might be beneficial in resolving QuickBooks error 6150. However, if you are still experiencing this issue, you can contact our professionals through live chat facility.

How To Fix QuickBooks Migration Failed Unexpectedly Error

Many times, the users might confront QuickBooks Migration Failed Unexpectedly error while shifting the data file from one system to another. In other instances, it may occur when there are some issues with the QuickBooks Migrator Tool.

Whenever the error pops up you won’t be able to transfer the file to another device. As a result, it might lead to delays in the ongoing work and hampers the overall work. Therefore, it is essential to tackle the error asap using the correct resolution methods. Read this post carefully to gain information regarding how to fix the issue with ease.

Wondering how to tackle the QuickBooks Migration failed unexpectedly error? Worry Not!! Dial @ +1-844-508-2335 and have a conversation with our experts to get your issue resolved instantly.

Factors Responsible For the QuickBooks Migration Failed Error

Usually, the users might end up with the QuickBooks Migration failed unexpectedly error while accessing the Migrator tool. Apart from this, there are numerous other factors that are responsible for this error. We have elaborate on all of them below, have a look at them.

  1. The QuickBooks Desktop version you are operating to migrate the data is of obsolete version. 
  2. Not operating the QuickBooks Migrator Tool of the newly launched version.
  3. Sometimes, it might evoke when the antivirus software or other malicious infections is hampering the QuickBooks migration process. 
  4. In other instances, it may trigger due to the damaged company file folders. 

Effective Ways to Troubleshoot QuickBooks Migration Failed Unexpectedly Error 

Dealing with annoying QuickBooks errors such as QuickBooks Migration failed error is not an easy task. But, you can get rid of such issues easily after knowing the proper steps to rectify the error. So, to give proper details regarding the resolution methods, check the pointers given below. 

Solution 1: Shift the QuickBooks Data File To a New Computer 

Implement the instructions below to move the QuickBooks Desktop data to the new computer. 

  1. To commence with, install the upgraded version of the QuickBooks Desktop on your device. 
  2. Thereafter, you must establish a backup of your old QuickBooks Desktop data. 
  3. Now, you are supposed to copy the particular backup on your new device. 
  4. In the new system, Migrate the QuickBooks Company File to a new computer. 
  5. Next, launch the QuickBooks application and restore the specific data file. Later on, act according to the instructions shown on-screen to wind up the restoration process. 

Solution 2: Move the Entire QuickBooks Data Folder 

At times, users might come across this error when they haven’t transferred the entire folder on their new PC. therefore, to verify whether you have shifted the entire folder, implement the steps below carefully.  

  1. In the beginning, launch the QuickBooks Desktop on your device. Then, look for your company file. 
  2. You must press the F2 key from your keyboard to open the Product Information window in front of you.
  3. Afterwards, move to the Start menu and click on File Explorer to launch it on your device. 
  4. Now, you have to access the given company file folder. 
  5. After finding the appropriate folder, right-click on it to choose the Copy option. 
  6. Conclude the process by pasting the particular file with the required location. 

Solution 3: Configuration of the Program Files

  1. Primarily, you must utilize the Admin Windows account to sign in to the Windows operating system. 
  2. Thereafter, go to the Control Panel and select the highlighted Programs and Features option. 
  3. In the first stage, you must access the Admin Windows account to log in to the Windows operating system.
  4. After this, launch the Control Panel and opt for Programs and Features or the App option.
  5. Following this, navigate to the QuickBooks Migrator Tool from the available lists of options. 
  6. Furthermore, hover your cursor over the Uninstall/Change option > Repair option.
  7. Afterward, go through the instructions on the screen to end the repair process.

Solution 4: Ensure You Are Operating the Upgraded Version of the Windows operating system 

Sometimes, accessing the obsolete version of the Windows operating system might result in a QuickBooks Migration error. Therefore, to fix the issue, examine that you are using the upgraded version.

  1. Press the Windows key from your keyboard and go to the Settings menu.
  2. After this, you must look for the Windows Update from the search results and then click on it. 
  3. Furthermore, access the QuickBooks Desktop and initiate the migration process after completing the Windows Update process. 

Solution 5: Utilize the Intuit Data Protect Plan 

The users can easily establish the backup company file using the Intuit Protect Plan. Further, go through the instructions below to accomplish the process. 

  1. Firstly, you are supposed to establish a backup file of your QuickBooks company file. 
  2. After this, you have to sign in to Intuit Data Protect on your new system.
  3. Navigate to the File menu within the QuickBooks application itself. 
  4. Following this, choose the Backup Company option from the next screen. Later on, opt for the Set-Up or Activate Online Backup option. 
  5. Next, you must pick the QuickBooks data file and hit the Continue option to proceed further. 
  6. Tick mark the checkbox beside the Backup Local Selected Documents. Further, tap on the Continue option to establish the backup file. 

Ending Words!!

We hope that the information conveyed through this post is beneficial for you to handle the QuickBooks Migration failed Unexpectedly error. However, if you are still not able to fix the issue, reach out to our professionals using the live chat facility.

How to Resolve QuickBooks Online Error 6250? 

QuickBooks Online error 6250 belongs to the error code 62XX and can take place when using the online version of the program. When the error occurs, it gives an error message with the text – “The customer you have specified has been deleted.” The error message indicates that the customer you have specified doesn’t exist.

There are multiple possible factors that can give rise to this error. For error-free accounting with QuickBooks Online, you need to resolve the error code 6250. It also requires you to list the possible reasons behind the error. Worry not, as we have listed the common factors that can give rise to the error along with their troubleshooting solutions.

Need help with error code 6250 in QuickBooks Online? Get in touch with our trained professionals using our helpline number +1844-508-2335

Factors That Can Promote Error 6250 in QuickBooks Online

Some of the main reasons behind the arrival of QuickBooks Online error 6250 are stated in the below-given list:

  • You can make transactions with an active customer. If the customer is inactive, you can get an error message on your screen.
  • Make sure that the time and date settings on your machine are correct, or you will have to deal with an annoying QuickBooks Online error.
  • An unaccomplished accounting task was caused due to abrupt system shutdown.
  • Erroneous SSL settings can also bring forth the error code 6250 in QuickBooks Online.

Recent Post – Resolve QuickBooks Error 61686

Symptoms of Error 6250 in QBO

An error in QuickBooks can be determined by the symptoms that it shows on its arrival. You can determine the error code 6250 by the below-listed symptoms:

  • QuickBooks error message 6250 will show up.
  • A warning message indicates that the intended customer for a transaction is inactive.
  • You may not be able to proceed with an ongoing task due to the error.
  • An abrupt system shutdown can also be experienced.

Troubleshooting Solutions For Error Code 6250 in QuickBooks Online 

If you are wondering how to resolve the QuickBooks Online error 6250, the below-given solutions can help: 

Solution 1: Make Sure That The Customer Is Not Inactive 

As we have discussed that an inactive customer is one of the most apparent reasons behind the error. Make sure that the customer is active. If not, you will need to activate the customer by implementing the below-given steps: 

  • When on your internet browser, go to the QuickBooks Online login page and enter accurate credentials to log into your account. 
  • Once logged in, click on the Sales option. 
  • Now you need to select the Customers option to move ahead. 
  • When the customer’s list shows up, choose the include inactive customers option. 
  • Here, click opt for the customer of your choice to select the customer you want to activate. 
  • In the end, you will notice that the customer has been deleted. Just click the Make active option to accomplish the task. 

Check the status of the QuickBooks Error 6250. If , move to the next procedure. 

Solution 2: Rectify The Date & Time On Your Machine 

Incorrect date and time settings on your system can also give rise to the error. Rectifying this setting can keep the QuickBooks Online error 6250 at bay: 

  • On the bottom right corner of your screen, you can locate the date and time option.
  • If the date and time are not correct, right-click on it, and when you see the Adjust Date and Time option, click on it.
  • Here, you can make the required changes and choose the correct Time zone to move ahead. 
  • Once done, click Apply and then OK to finish. 

After correcting this setting, open your Internet Browser and make sure that it is updated with the latest release. If not, you can update it manually and check if the error 6250 in QuickBooks Online is resolved or not. If you still get the error message, try the next solution. 

Solution 3: Configure Your SSL Settings Correctly 

Sometimes, it can be a faulty SSL setting that can promote error 6250 in QuickBooks. In such a case, you need to correct it by implementing the below-given steps: 

  • First of all, navigate to the Internet options on your browser.
  • After that, go to the Advanced connection settings option to proceed further.
  • Next, move to the Advanced option, wherein you need to choose Security.
  • Here, you need to ensure that the checkboxes for Use SSL 2.0 and SSL 3.0 are marked. 
  • After confirming, you can click Apply and then the OK tab to finish this task.

Ending Words!

The solution explains some crucial aspects of QuickBooks Online error 6250, such as its possible causes, symptoms, and troubleshooting. Implementing the provided solutions can guide your way to the error resolution. However, if you find it difficult to resolve the error, you can connect to our team of experienced professionals, and they will guide you with one-on-one troubleshooting assistance.

Instant and Simple Methods to Resolve QuickBooks Error 61686

Many times, the users might face issues while installing the QuickBooks Desktop due to QuickBooks Error 61686. Thinking about the exact reason behind the error? It may occur because of the damage in the installation of Framework.xml. The users might receive the following error messages on their computer screen when the error pops up stating:

“The installer encountered an error when running “C:\Users\Owner\AppData\Local\Temp\Premier\QBooks” /quiet /norestart INSTALLDIR=”C:\Program Files\Intuit\QuickBooks 2011″ QB LICENSENUM=0x2x-3x4x-5x6x-7×8″

Other reasons that might lead to this error is fault in installation of .NETFramework or due to unstable internet connection. Further, in this post we have covered all the essential facts that are necessary to fix the error code 61686 in QuickBooks.

Having trouble while dealing with QuickBooks Error 61686? Call us at @ 1844-508-2335 and consult with our experts to get the best possible guidance within the least time applicable. 

Reasons Why You End Up With QuickBooks EXEAdapter Error 61686 

Knowing the actual cause behind the QuickBooks Error 61686 will help you overcome the error. Here, we have discussed all the possible factors that are responsible for the occurrence of the error. Go through them closely.

  • Sometimes, it may occur due to an inappropriate installation of Microsoft .NETFramework on a Windows device.
  • Another reason may be damage in the Framework.xml file.
  • You are operating the unsupported version of Microsoft .NETFramework.
  • In other instances, it may occur when Windows is infected due to some virus or other unknown online threats.
  • Moreover, it might occur when the Framework.xml file has been mistakenly removed from your device.

Situations When You Encounter QuickBooks Error Code 61686 

There are numerous signs and symptoms that can help you determine QuickBooks Error 61686. So, to let you know about all of them, we have listed a few of them below.

  • You might see the error message with code 61686 continuously fluctuating on your computer screen.
  • On the occurrence of this error, you might notice poor performance of your computer system.
  • Sometimes, you might discover that your operating system starts freezing and thus weakens your system’s performance.
  •  You might see that your system starts freezing frequently.

Verified Solutions to Troubleshoot QuickBooks Error 61686 

Now, it’s time to fix the QuickBooks Error Code 61686 using the correct resolution methods explained below. Go through the solutions given below attentively.

Resolution 1: Assign a New Name to Framework.xml file 

Usually, the users need to change the name of the Framework.xml file to resolve the issues related to the file. Proceed further with the steps given below to accomplish the process.

  • Primarily, navigate to the C: drive and open the QuickBooks folder on your device.
  • Next, look for the file named Framework.xml and right-click on it.
  • Furthermore, you are supposed to pick the Rename option from the drop-down menu list.
  • You must give a new name to the file by inserting .OLD to the end of the filename.
  • After this, save the mandatory changes made and ascertain whether you are getting the error.

Resolution 2: Fix the Damage in .NETFramework Through System File Checker Scan

Read the pointers below carefully to repair the damage present in .NETFramework through the System File Checker scan.

  • To commence with, press the Windows + X keys together on you keyboard.
  • You are supposed to choose the Command Prompt (Admin) to launch the Prompt window.
  • Now, you must add the following path: “DISM.exe > Online > Cleanup-image > Restorehealth”.
  • Further, press the Enter key before opening the System File Checker Scan.
  • In the next screen, add the “sfc/scannow” within the command prompt window.
  • All you have to do is to wait for a few minutes until the SFC winds up the scanning process.
  • Once the process is over, open Windows again when you see the Command Prompt with Windows Resource Protection repair system files.

Resolution 3: Fix the Registry Entries Related to QuickBooks Error 61686 

  • In the initial stage, tap on the Start menu.
  • After this, you will see the depiction notice in the request box, you won’t have to hit the Enter key.
  • Hold the Ctrl + Shift keys altogether and then hit Enter key to move further.
  • Review the message that pops-up on your screen and give consent to it by tapping on the Yes option.
  • Eventually, you will get a black box on your screen, choose the Reddit option.
  • Beneath the Registry Editor, you must pick the error 61686 key.
  • Next, choose the highlighted Export here option from the File menu. Then, check that you have saved it in the mentioned list.
  • You must opt for the Organizer where you see that the Windows Installer key is abandoned.
  • Proceed further by picking the identity for the file in the specific box and assign a name like Windows Installer Backup.
  • Look beneath the Export Range box, check the availability of the Choose Branch option.
  • Tap on Save option to restore the mandatory changes.
  • As a result, it will display the records along with the .reg document extension.
  • At last, you will see that you will got a member of the Windows Installer-related registry regiment.

Wrapping It Up!!

We ensure that you can now easily install and update the accounting software without encountering QuickBooks Error 61686. However, if the issue still exists, you can have a one-to-one consultation with our professionals via live chat for quick resolution.

QuickBooks Error 6007 Quick and Easy ways to Fix

Are you stuck with QuickBooks Error 6007 while accessing the company file? Thinking, what’s the reason behind it? It may happen when the data file is in single-user mode, and users attempt to access different computers in the same time. As a result, it won’t permit the users to access the company file. On the occurrence of the error, you will be represented with the error message indicating:

“Error 6007: There was an error while connecting to your company file: QuickBooks is in single-user mode.”

If you are also experiencing the same error, you must go through this entire post and get simple solutions to fix Error Code 6007 in QuickBooks.

Thinking about how to deal with QuickBooks Error 6007 and need expert’s help? Ring us at @ +1844-508-2335 and let our experts handle all your issue within the least time applicable. 

Reasons That Contribute Towards QuickBooks Error Code 6007

Before further troubleshooting, it is crucial to know the root causes that might lead to QuickBooks Error 6007.

  1. You are accessing the unsupported version of QuickBooks Desktop.
  2. The user hasn’t logged in to QuickBooks with the proper administrative credentials.
  3. Sometimes, it may appear when the third-party security application interferes with QuickBooks to launch the data file.
  4. Using an obsolete version of QuickBooks Sync Manager may be responsible.

Indications of Getting Error Code 6007 in QuickBooks

Below, we have explained some signs and symptoms to help you recognize the QuickBooks Error Code 6007. Read the below-given pointers carefully.

  1. It stops the users from opening the company file.
  2. On the occurrence of the error, users won’t be able to access the crucial company records.
  3. You might experience your system performing sluggishly while opening the QuickBooks Sync Manager.
  4. When the error occurs, it flashes the error message on your computer screen.

Things You Must Consider Before Fixing Intuit Error Code 6007 

You must consider a few points before moving ahead to the troubleshooting part. Doing so will help you in fixing the QuickBooks Error Code 6007.

  1. Cross-check that your QuickBooks Desktop is upgraded to the newly launched version.
  2. It is important to generate the backup company file to use the duplicate one if the original one gets damaged.
  3. Verify that you are connected with a reliable internet connection.

Verified Solutions to Rectify QuickBooks Desktop Error 6007 

In this blog section, we have covered the simple ways to overcome error Code 6007 in QuickBooks. Follow the steps in the same manner as given below.

Troubleshooting Method 1: Check that QuickBooks Sync Manager is Updated to the Latest Version 

As stated above, using the outdated QuickBooks Sync Manager might cause QuickBooks Error 6007. So, to fix the issue, upgrade it to the newly launched version by implementing the steps below.

  1. Initially, move to the Help menu and select Sync Data Manager.
  2. After this, hit the Reset option followed by the OK button.
  3. You are supposed to sign in to QuickBooks using the appropriate username and password.
  4. Subsequently, the Sync Manager will begin the first sync.

Troubleshooting Method 2: Get the Latest Version of QuickBooks Desktop 

Upgrading the QuickBooks Desktop to the newly launched version is the best way to fix the technical glitches. Installing the new updates will help you utilize the latest features and thus prevent you from getting errors like QuickBooks Error 6007.

  1. Firstly, open the QuickBooks Desktop and tap on the Help menu.
  2. Afterwards, move to the Update QuickBooks option, followed by the Reset Updates option.
  3. Furthermore, head towards the Get Updates option to initiate downloading the updates.
  4. Relaunch the QuickBooks Desktop application. It will eventually send you an install prompt on your computer screen. Go through the instructions displayed on the screen to install the updates appropriately.
  5. Finally, you must launch the company file and see whether you encounter the same issue.

Troubleshooting Method 3: Look For The Single-User Mode

You must cross-examine whether the single-user mode is enabled or not. Turn it on in QuickBooks using the instructions below if it’s not enabled.

  1. In the beginning, run the QuickBooks Desktop application and move to the Utilities option.
  2. Navigate to the Single-User mode option to switch to single mode if it’s not already enabled.
  3. Once again, you must launch QuickBooks and try to launch the company file. Then, use the QuickBooks Sync Manager to see if the error persists.

Troubleshoot Method 4: Fix the Damaged QuickBooks Desktop Program 

Repairing the damage in the QuickBooks Desktop might help you resolve error 6007 in QuickBooks. To do so, apply the steps listed below attentively.

  1. Firstly, tap the Start menu and insert “Control Panel” within the search area.
  2. From the upcoming window, navigate to the Programs and Features option.
  3. Soon after this, opt for the QuickBooks option and tap on Uninstall/Change.
  4. Later on, hover your cursor over the Repair option.
  5. At last, go through the instructions on the screen to complete the repair process.
Wrapping It Up!!

We hope that by implementing the instructions explained in this post, you can easily tackle QuickBooks Error 6007. However, if you still have any further queries consult with our professionals anytime through live chat for quick assistance. You may also consult with our highly-skilled professionals by dropping an mail regarding the query for instant help.

Logical Techniques to Fix QuickBooks Error Code 6131, 0

Are you stuck with the QuickBooks Error 6131, 0 while accessing the company file? Wondering why it happened? At times, users might encounter this issue due to the damage in .ND and .TLG files. Another reason that might trigger this error is insufficient admin rights to access the data file. Whenever the user ends up with this error, it stops the user from accessing the file and halts the entire work. 

Read this entire post thoroughly to know the root causes that might lead to company file error 6131, 0. Also, we have elaborated on the simple methods to resolve the error below. 

Facing issues while accessing the company file due to QuickBooks Error Code 6131, 0? Ring us at @ +1-844-508-2335 and talk to our highly-qualified professionals to resolve your issue within no time. 

Reasons that Might Give Rise to QuickBooks Error 6131 

Finding out the main triggers behind a particular error assists the users in fixing the issue easily. To learn more about the factors responsible for the QuickBooks Error Code 6131, read the points below. 

  • Inappropriate settings of the security applications might cause issues while accessing the company file.
  • You are using an unsupported version of the QuickBooks application or Microsoft Windows. 
  • Placing the company file on an external storage device instead of storing it on the local storage device can be one of the reasons.
  • Improper installation of the QuickBooks Desktop might result in QuickBooks Error 6131, 0.
  • A corrupted or damaged company file may also be responsible. 

Simplified Solutions to Overcome Error 6131, 0 in QuickBooks 

After getting a proper understanding about the root causes, let’s have a look at the troubleshooting methods to fix QuickBooks Error 6131, 0.

Solution 1: Search And Insert an Extension to the QuickBooks Network Data File 

The main function of the network data file is to keep a proper record of the company data and everything that needs QuickBooks to work flawlessly. Even if there are issues with the company file name, users won’t be able to open the data file. Therefore, to fix the issue, add an extension to .ND file using the steps below. 

  • Reach to the folder that comprises your QuickBooks company file. 
  • If you cannot find it, move to the hard drive where you place all the files. 
  • Navigate to the file having the file extension .ND, right-click on it, and choose the Rename option to insert the different extensions. 
  • After this, initiate the process by changing the name of the files by adding an extension .viz, “.old”. 
  • Ensure you haven’t updated any other segment of the data file. 
  • Finally, open the company file and see whether you still receive the same error. 

Solution 2: Shift a Copy of the Company File into a Different Folder

If you failed to access the data file and couldn’t access the data in the data file, then you can extract the data. For this, you must generate the backup company file and save all the stored information. To do so, execute the steps written below attentively. 

  • In the initial stage, you are supposed to establish a new folder.
  • Next, you have to return to the previous folder where the data file is placed and right-click on it.
  • Afterwards, choose the Copy option and move back to the newly created folder. 
  • You are supposed to paste that file into the newly generated folder.
  • Once again, you must run the QuickBooks Database Server Manager to scan the data file and to check that you can open the file properly. 

Solution 3: Put the Process of Antivirus and Other Software at Halt

Sometimes, incorrect settings of the security applications stop the users from the normal functioning of QuickBooks. Therefore, switching off its function can clear off all the interrupted pathways and help you regain access to QuickBooks company files. For this, go through the instructions given below thoroughly;

  • Begin the process by relaunching your workstation in safe mode. 
  • After this, open the antivirus software and switch it off by reaching the Settings menu. 
  • If you still get the QuickBooks Error 6131, try relaunching the system in normal startup mode. 
  • Once you have completed the steps, try to access the data file and check whether you are still receiving the error. 

Solution 4: Terminate all the QuickBooks Processes Using Task Manager

Sometimes, the background process running in QuickBooks might interrupt the users from accessing the data file. Therefore, to fix the issue put an end to all the QuickBooks processes using task manager. 

  • Firstly, use the proper administrative credentials to sign in to your device.
  • Use the Ctrl + Shift + Esc keys to launch Task Manager on your device.
  • Afterwards, move to the Processes tab from the top of the page.
  • Herein, you must select the QuickBooks processes comprising QBW32.exe, qbupdate.exe, and QBDBMgr.exe and end them one after the other by hitting the End Task tab. 
  • Next, launch QuickBooks and once again try to launch the data file. 
Solution 5: Try Installing the Latest QuickBooks Updates
  •  Begin the process by opening the QuickBooks File menu.
  • After that, select the highlighted Update QuickBooks Desktop option and click Update Now option.
  • Now, opt for the Reset Update option and hover your cursor over the Get Updates option. 
  • Once the update process is over, exit the QuickBooks Desktop application.

Final Words!!

We hope that you find this blog informative and it will help you in resolving QuickBooks Error 6131 easily. If the error still interrupts you while accessing the data file, contact our experts via the live chat facility for a quick remedy.